PPA-Installation Guide
This is a step-by-step procedure for installing Shutter on Ubuntu, aimed at beginners or users who rarely worked with PPAs (Personal Package Archives) before.
Please note: This guide applies only to Ubuntu.
Ubuntu 9.10 (Karmic) and later
- You can add a PPA to your system with a single line in your terminal. Open a terminal and enter:
- Now, as a one-off, you should tell your system to pull down the latest list of software from each archive it knows about, including the PPA you just added:
- Install Shutter
sudo add-apt-repository ppa:shutter/ppa
sudo apt-get update
sudo apt-get install shutter
On older (pre 9.10) Ubuntu systems
- Add Shutter PPA to your ‘Software Sources’
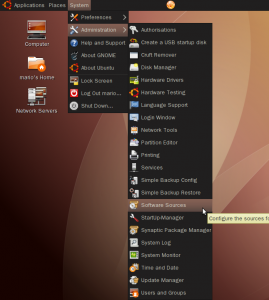
Navigate to System ▸ Administration ▸ Software Sources
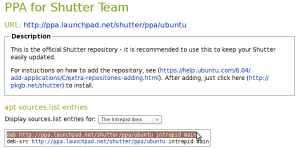
- Visit our PPA (hosted at Launchpad.net – https://launchpad.net/~shutter/+archive/ppa)
Select your Ubuntu release and copy the first line into your clipboard (Ctrl+C) as shown below.
- Each PPA has its own unique key that is used to sign the packages in that archive. To add the PPA’s key to your own system open a terminal and enter :
wget -q https://shutter-project.org/shutter-ppa.key -O- | sudo apt-key add -Hint: Don’t forget the trailing dash. You’ll see a confirming ‘OK’ when the command was successfull.
(Until you add the PPA’s key to your own system, you’ll see warnings that you’re downloading from an untrusted source)
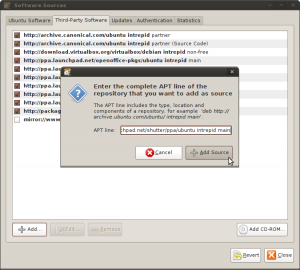
- Return to the ‘Software Sources’ window, navigate to the Third Party Software tab and hit the Add button.

- Paste your clipboard content into the entry box of the following popup to add our repository to the list of software sources. Then click on Add Source.
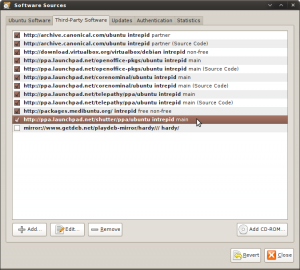
- If everything worked as expected our repository should be activated now. You can now close the window.
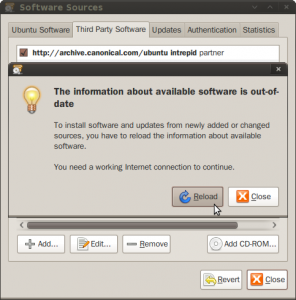
- When prompted to ‘Reload the information about available software’ press Reload and wait for the operation to complete.
- Now, just click here to install Shutter (using AptURL)
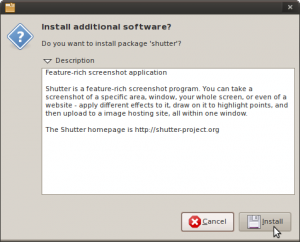
or open a terminal and enter:
sudo apt-get install shutter
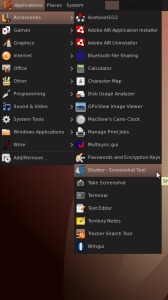
- After the package manager has done its work you will be able to start Shutter for the first time using the menu entry.
57 Comments
Trackbacks/Pingbacks
- Shutter: Realizar capturas de nuestra pantalla. | My Blog - [...] Información. / /faq-help/ppa-installation-guide/ [...]
- Three Ways To Capture Screenshot In Ubuntu Linux | betaSir - We love software - [...] of any particular area, window or whole screen. You can get its installation guidelines from here. Once installation is…


Gut gemacht!
This Article very useful. It’s a good inspiration. Thank you.
Hello
I’m trying to use a short key-combination for select a region on RHEL6.4 it dont let me do it, Print is working for the hole windows,
what can I use as default only use lefthand for start capture a region
thank u great guide..
great guide! Thank you very much.
I am new to Ubuntu and as my work requires use of Snagit daily, I was desperate fora a similar application in linux. Shutter is great especially because I like to edit the captured images and add arrows, texts, annotations etc.
Problem I have is I cannot copy the captured image to my documents eg copying to Libre Office gives the error “Requested clipboard format is not available”.
Please can you help
Dare
It works fine here, sorry. Are you pasting the image via Ctl+V? What version of Ubuntu/LibreOffice and Shutter are you using?
How to avoid that every time shutter starts be updated? It takes too much time!
If this happens every time you start Shutter this is a bug. Are you using Ubuntu? Could you please verify that the package libnet-dropbox-api-perl is installed?
Thank you so much Romario! I didn’t have it! I installed libnet-dropbox-api-perl and now works fine.
you can also use this keyboard shortcut … ALT+PrintScrn it works perfect… you can give it a try